 Photos add a significant amount of engagement of your readership. You’ll note that I have at least one image in every post I write. In order to reduce the amount of hosting space and speed up loading, I always resize the images to 300 pixels in the maximum dimension before I upload them. For this, I use GIMP.
I get images from several sources, but I am always careful to check them before hitting the “publish” button to make sure that I have the correct permissions to use them.
There is a web-based (free, at least for now) service called TinEye (tineye.com). In FireFox, you can install an add-on that will invoke a TinEye search with a right-click on the image in question. If I get a lot of hits on the search, I look for references to Getty Images, iStockPhoto, or other well-known commercial stock photo sites. If any of those show up, I either buy the photo or find another.
Note that the Big Guys in the business of selling photos have caught on to all of the manipulation tricks like reversing, stretching, color changes, etc., so don’t do that.
I’m a relatively good photographer, and I have several pretty good cameras (actually, the camera in most cellphones is good enough for most web images), so I have been building my own stock of images. I take photos of pretty much anything that I find interesting and stick them in Evernote.
I’m slowly moving towards using mainly images that I took myself. Usually, I can set up and take a quick snap of something to use on one of my blogs.
Be aware that you need a model release if your photos include any recognizable people other than people in the public domain (you can photograph politicians, public speakers, well-know celebrities, etc., and use those). When I’m writing an article on people I know (e.g., Martin Avis or Sarah Staar), I send a courtesy email to request permission (so far, 100% success rate). Sometimes, the folks that I want to depict will furnish a selection of portraits along with their permission.
And sometimes, I’ll even get some special deals. It just pays to be nice.
Here are some of my other sources of free images:
- CompFight.com — You have to be especially careful with this one! Sometimes you will find an image tagged as Creative Commons that has been pirated from a commercial source. This site will give you a cut-and-paste attribution to use, which is nice.
- Flickr.com — As with CompFight, you have to be careful. Most of the images in CompFight are actually from Flickr, but Flickr is less convenient to use directly.
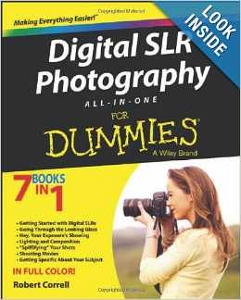
- Amazon — If you have an affiliate relationship with Amazon, you can generally use an image you find there and use your affiliate link with it. They allow that usage. In fact, they encourage it. Note that I used an Amazon image in this post — I don’t expect to get much in the way of commissions from it, but having a good source of images makes having an affiliate relationship with Amazon worthwhile all by itself. (And, it’s a good book. I got a copy for myself, and I have made good use of it.) Other than that use, Amazon is not all that valuable because the commissions are so low.
- YouTube.com — You can not only imbed videos in your blog from YouTube (like Amazon, they encourage that usage), you can use still “captures” as images, as long as you credit YouTube.
- Your own photos — If you follow the rules for people (and occasionally, buildings and monuments), this is the best source of photos. I generally try not to get images of people, especially children, that show faces (or, use GIMP to render any faces unrecognizable). As I mentioned, I’m building my own library of photos. The main challenge (other than taking good photos, which is covered in the Digital SLR Photography All-in-One for Dummies book) is figuring out how to tag them for future retrieval.
I have used other “free” sources, but sometimes the hassle factor is more than I want to put up with.


